Allies Will, Mark H, Rob
Axis Paul, Phil, Blair
Will organised the scenario rules, with deployment Zones & Objective Placement laid out as in the diagram below.

Force selection:
· Each team has 4000pts split into 2 companies
· 1st company is 2500pts (this is the “attacking” force)
· 2nd company is 1500pts (this is the “defending” force)
· Up to 100pts can be moved across the forces, i.e. if the team decides a stronger defending force is required then they can re-allocate 100pts, bringing the total up to 1600pts, but only leaving 2400pts for their attacking force.
(This allows teams use up points left over, but also allows teams to make some decisions of where they think that extra platoon is going to be most useful).
Forces should only be selected from the “Market Garden” or “Bridge by Bridge” Late War FoW books.
The British “defending” force must be a British Parachute or Air landing Company.
Table set-up: Table can be laid out in a mutually agreeable way prior to the game. Preferably with a bridge somewhere, but only 1 river! There should be a “town” area in each of the defenders deployment zone.
Objective placement:
For objective placement during stage 1 to 3 below, the British players place their objective first.
1. Both players place an objective in the area outlined by the red box labelled “C”.
2. Both players place an objective in the area outlined by the red box labelled “D”
3. Both players place an objective in the area outlined by the red box labelled “B”
4. The British “Attacking” player places an objective in the area outlined by the red box labelled “E”
5. The German “Attacking” player places an objective in the area outlined by the red box labelled “A”
This gives a total of 8 objectives (the bridges weren’t the only objective!)
Force Deployment:
1. The British “Defending” Company deploys first. Half the platoons must be deployed on the table (rounding down), of which 1 can be held in ambush. The remaining platoons are held in Reserve. The company starts in Prepared Positions.
2. The German “Defending” Company deploys second. Half the platoons must be deployed on the table (rounding down), of which 1 can be held in ambush. The remaining platoons are held in Reserve. The company starts in Prepared Positions.
3. Both “Attacking” Companies are deployed simultaneously.
4. Both teams roll a die. Highest roll takes first turn.
5. Before starting, the team taking first turn deploys all Independent teams
6. The second team places all Independent team
7. The first teams “Attacking” Company now makes any reconnaissance moves
8. The second teams “Attacking” Company now makes any reconnaissance moves
9. “Defending” forces do not get to make reconnaissance moves
10. The first teams first turn now commences
Victory Conditions:
1. One of the Attacking Companies fails company morale
2. One of the Defending Companies fails company morale before turn 6 (if after turn 6, then it is ignored, they have done their job). Platoons from this company remain on the table, but start each turn pinned down
3. One side captures all 8 objectives
4. At the end of turn 8, the game ends. Winner is determined by total VP’s
VP calculation:
1. Each side gains a VP for each objective held (if an objective is contested by both sides, then neither side gets the VP)
2. If a platoon from the “Attacking” force holds an objective that is over the halfway line, then that side gains a bonus VP
3. If a platoon from the “Attacking” force holds the objective that was furthest away at the start of the game, then the side gains 2 bonus VP
4. The German side gains a VP for each British platoon destroyed
5. The British sides gains a VP for each platoon still over 50% strength
______________________________________________________________
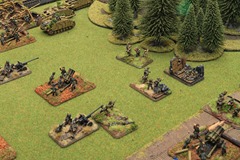
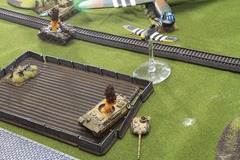
So here’s a bunch of photos I took during the game. 


I wont comment on to much detail of the game as I’m sure the boys will do a much better job of that than I can. But the end result was the Allied won on an 11 to 10 point difference. So it was right down to the wire with the Allied forces taking more objectives in the very last turn of the game, but taking more casualties overall.
Thanks lads for a great game.
Here’s a link to Will’s photos he took during the game as well. http://s872.photobucket.com/


No comments:
Post a Comment