07 November 2021

Resin Printer Fume Box / Cabinet Project completion.

 Spent most of the day yesterday designing and building the window bracket to secure the window and hold the extraction fan vent. After measuring it it twice, I then did up a cardboard mockup to make sure I hadn't overlooked anything. Then spent the afternoon cutting up and building it out of 8mm plywood. Had to make a few adjustments as I went but nothing major. The end result has worked out really well, with the window locked and secure, about 160mm open at the bottom. Then the vent mounted facing down so no rain will get into it and the sides of the opening also covered and secure. So the fume cabinet project is now complete. 

window vent

The project aim was simply to have a cabinet to contain the smell of the resin and push it outside. Well that turned into a we bit more of a project than I planed, but what else can one do in lockdown.

The end result
18mm Plywood cabinet with external hinged doors for easy access
Intake Fan with on/off switch
3D printed intake vent cover
3D printer power cable cover
LED internal cabinet lighting with on/off switch
Extraction Fan with on/off switch and variable speed fan controller
3D designed and printed extraction tube mounting bracket
8mm Plywood window bracket
Full ducted from cabinet to window

Must say I'm pretty stoked with the outcome.

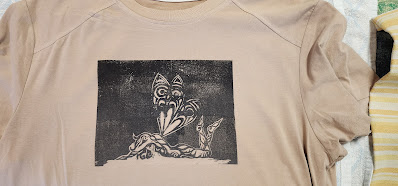
Hot of the printer last night was this big guy for my Snake Army. It's the Maneater Skullnaga which I got the file from Artian Guild. They make some awesome models which you can find at 

Artisan Guild is creating Excellent 3d Printable Miniatures for your games! | Patreon


03 November 2021

Necromunda Terrain

 Every since I moved into the new house a year ago I've been having weird issues with my FDM printer. It would randomly stall during long printers, and somethings even small prints. About 10% of the time it would lockup. So I finally got around to tracing the issue back to the Raspberry Pie I was using and the OctoPrint system. I scrapped it and reinstalled clean with only the parts of the OS and add-ins that I use and the old CR10 printer has been cranking out great prints ever since. The old printer is now three years old and still going strong, so cost wise its easily paid for itself with all the terrain and models I've mode over that time.

 I've been steadily printing terrain for Necromunda and or other Sci-Fi games. I'm defiantly hanging out of some table top time in the near future, once the government lets us out to play. In the mean time I have a fair bit of terrain to paint.

Necromunda Terrain

Necromunda Terrain


Smaug

 Big Red finally got a base coat 

Smaug  W.I.P.

Smaug  W.I.P.


02 November 2021

Snake Clan

 I've actually got some painting done over the last few nights and started working on my Snake Clan army for Warlords of Erehwon. I started at the end of 2019 and with the house build and then move I never got back to it. But with the resin printer, and some awesome models I've been printing up.

Painting is a bit rusty but its slowly coming back to me.


Also tried out printing a larger model hollowed out. Love this squid head. It will be fun to paint that's for sure.  


27 October 2021

Resin Printer Fume Box ... almost complete

So the second voltage switch finally arrived from China and I had time to install it tonight after a quick test. Thankfully this one works sweet after the disappointment of the last one. So I can now lower the voltage to the extraction fan which in turn lowers the noise generated from the fan. Which is great since its right next to my computer desk.

Resin Printer fume box

So the Fume box is pretty much finished now, the last task is to sort out a bracket for the extraction tube and secure it to the window. I'm currently just pinning it in place with window open about 120mm. This works great but its not very secure, so needs some sort of bracket and locking mechanism. All part of the fun.

24 October 2021

Smaug

 I've been enjoying painting Necromunda models, so no surprise  I caved in and went and purchased the new Necromunda rule book and the House of Blades book. Hopefully I will be able to get some of the lads at the club to play at some point. Either the new or old rules.

In the mean time I have finally got some more green stuff so I've been putting together Smaug. He didn't fit together very well with the expansion of the resin during curing, so I had to do do alot of filing in to make the parts all work after sanding them back. I think the end result will be ok, if I get my painting right it should hide most of  the lines. He's definitely a big beasty

Smaug

Smaug


17 October 2021

Them Trolls

 I managed to get in some painting time today. So to start with and to do something different from Necromunda models I started on my three trolls for LOTR. Using alternative models I had printed up last week. 

I'd been having issue gluing the resin models together, so after some advice from a Mark the other week, I ordered some accelerator for super glue, which turned up on Friday. It works really really well, and I've been able to glue the resin parts together really easily. It's awesome stuff. The Zap Zip Kicker is well worth it, saves time and frustration.


I've got the first few colors down on the trolls along with the first skin wash.

Trolls


While I wait for the troll wash to dry I moved onto a few more Necromunda models and got the base colors down....man I'm so looking forward to actually playing some games...soon I hope, once we get out of lockdown.


Necromunda

Necromunda

Necromunda


16 October 2021

Completion in site

 A very busy week at work and not much energy to do too much in the evenings, so I haven't done much over the last week or so. Today however  I made up a bracket for the 120mm fan and mounted into the cabinet today. Using the supplied bolts that came with the fan along with some rubber washers to reduce the vibration transfer from the fan to the cabinet. Then just used some tape to seal up 2mm gap created by the washers.


The cabinet is working really well, and hopefully my second voltage controller will turn up in a few weeks, after the first one was busted, in the mean time I can just run the fan at full speed.

The voltage controller will be the final bit to go into the cabinet, and now I'm working on the window attachment to hold the exhaust exit tube and secure the window shut.

My Escher Gang for Necromunda is coming along nicely (all to slowly)  and I even found my old 40K buildings. I've still got another 10 or so models for the Escher gang to paint, along with a bunch of cyberpunk models to make up another gang.

Escher Gang - Necromunda

I'm really looking forward to getting out of lockdown and playing some games.


07 October 2021

The Good old days

 I signed up as a Patreon today to "The Printing Goes Ever On", they have some great models that will work really well for Lord of the Rings game. So I can start on my new army, which I intend to print all the models myself. 

Gelatinous Cube
Gelatinous Cube

Hot off the printer are some models for my nephew who is playing DnD and wanting to learn to paint, so I found a few classic DnD style models for him. The Gelatinous Cube is so good, I've got another one printing for myself. So many good memories of dungeon crawls and running into Gelatinous Cubes..... the good old days when you could actually go visit someone and not worry about plague bearers being amount us.

Ghost
Ghost


Ranger
Ranger

Wizard
Wizard


02 October 2021

I can see

 The voltage regulator I ordered from our friends in China via Ali Express turned up early in the week and I was excited to install it and get the extraction fan working on my resin printer fume cabinet. The packaging was terrible, just a bubble wrap bag, so the mounting flanges were bent…. no major, a pair of plyers sorted that, and its not as if I was worried about the cosmetic look. But unfortunately, when I came to actually testing it, the LED was all over the place at first and it tripped the main fuses on the house circuit. ...hmmm... that’s never good.

After pulling it apart to checking the internals which looked ok and I re-seated the LED connector, that sorted the LED out, but it then stopped changing the voltage and tripped the fuse again. So a dead unit for sure, after testing on my voltage meter it wasn’t changing anything.

Logged a dispute on AliExpress and sent some photos and a short video, a few hours later I got confirmation of a complete refund. The process was pretty easy, so big thumbs up to AliExpress, they continue to impress me with their service. Shame about the voltage meter, but shit happens and for $35 I'm not complain since I will get my money back in a week or so. I’ll go and see if I can find another brand to try out.

I did however get the LED's installed inside of the cabinet today with the on/off switch. Easy install and works great. It will make working on the printer and changing out things so much better. Best of all it will make checking the prints as they are building really easy.

The photos are with all the house lights out and only the LEDs on, so very happy with the results. 


Resin Printer fume cabinet


I also wired up the 120mm extraction fan directly with no variable control and tested that out. It has plenty of airflow, so things are looking really good for the extraction. I wasn’t sure if it would have enough power to do the job, but pretty sure it will work sweet now.

I've got the air ducting connector now printing on my FDM printer and I will pick up the ducting tomorrow fromt he hardware store. All going well I'll be able to do some proper testing during the week.

Air duct connector


01 October 2021

Hot off the printer

My 26 hour print of the exhaust shoot just finished. It had a bit of a hiccup at the end, but its still usable. With a small build table footprint and the heights, it was catching a little bit on the higher levels and caused the build plate surface to move on the last centimeter. 
Tomorrows job will be to clean it up and mount the fan and voltage controller which turned up yesterday.

26 September 2021

Assembling Smaug


The resin printer cabinet got some more work done on it yesterday, added in a centre flange to cover the join when the doors are closed and also some internal flanges along the sides behind each of the hinges to block any major light leaks. I've still got some clearance at the bottom so I can remove the spill tray should I have any disasters. Also bolted on the handles to the cover now that I'm happy with the setup as the valcro just wasn't cutting it.

I finally got around to start working on the Smaug print and putting him together. I discovered how much the print was out. That is the parts not fitting together and were well out. Which will be my printing settings and the expansion of the resin, something I hadn’t counted on. (I’ll need to learn more about that in the future)

So I got the good old Dremel out and found some sanding stone bits for it from the kit I had been given and tested them out on a block of resin I had kept from earlier mistakes. Once I had the right bits, I cleaned up the connection points on the model with some effort. Not having much experience with resin and sanding I took my time so not to break anything (including me). I discovered that it's a dusty process and a quick alteration to my spray booth cabinet had the dust going outside instantly. I just stappled up an old towel over the front of the spray booth with a slit up the middle so I could see and work. This was enough to create much better vacuum inside the box and I could see the dust rising off the model as I grinded it back.  Full breathing mask was mandatory of course, with resin dust you can’t be ignorant. So super stoked with the spay booth. All the effort I had gone to install the LED’s has really paid off. So, I’ve now got a sanding booth and spray booth.

With the joints in the model now a little out after the sanding, I’ll have to fill them in with green stuff and make a few alterations to the base to make it work. (All part of the fun)

This evening I’m trying out a resin mix of the last bit of green resin with some clear resin. It will be my first resin cocktail. I dont expect any issues as they are both from Anycubic standard resin range. More cyberpunks for Necromania, 6 models and a motorbike all at once.


23 September 2021

Test Results ... and more damn rain.

 Another 46mm of rain over night and the back paddock is flooded again, only slightly this time. Cant wait for summer ... although daylight savings is next week, so getting out of bed an hour earlier will be a mission. I'm seriously thinking of making a remote controlled boat, could be a good project for some winter fun.


On the bight side of things the printer cabinet is working awesome, first thing I noticed was the reduced noise level and reduction in smell, even thought he cabinet not yet vent outside the smell reduction was very noticeable. If I run the intake fans the noise level increased to similar to what it was when just running the printer on the bench. That seems mainly to do with the vent grill I currently have over it. Some more work and investigation into vent designs vs noise levels need, but that only minor in the grand scheme of things.

My setup for the toggle switch for the intake fans is working great, so looking forward to getting the extra switch's in the post and installing the LEDS lights.

Overall so far I'm pretty stoked with the new cabinet. The real test will be the extraction of the fumes out the window and how well that works. 

Painting wise, that's taken a back seat for a bit, but I've been slowly doing little bits on the gang and added in a firing arc on the bases to suit Necromunda


22 September 2021

The Big Test

 With the intake fan done and working, plus with the other parts a few weeks away I decided to setup the new printer cabinet and test it out in its current state. So with a hand from the wife we put it up on the workbench (gotta look after the old back these days)  where it will live. I cabled in the printer power and set up the resin printer. It was leveled perfectly ... share fluke on that part. 

Once the printer was in, I really showed that I need the interior LED's setup for sure, as the cabinet really cuts down the light even with both doors fully open. Of course that's one of the functions and reasons for the cabinet. Working space inside the cabinet is perfect, not to small and not to large to interfere with the aircon unit on the wall above the cabinet. 

Anycubic Photon Mono X and cabinet

I'm currently using an old servicing tray under the printer for drips and spill protection. I've used it for years for undercoating mini's. I'm sure its doubled in thickness with all the overspay in the 10 odd years I've been using it. I'll have to get around to getting something a little more cleanable once we are out of lockdown and shops are open once again.

I've started on my clear bottle of Anycubic basic resin using the same settings as what I used on the clear green resin. And attempting to print these lovely girls to add to my Necromunda gang.
Hopfully the settigns arent to differnet... still got a lot to learn about the settings for the differnet resins.
Necromunda Escher Gang 3d printed models


21 September 2021

Wiring

Started working on the wiring for the fans and switch this evening. The switch box printed really well last night, but I did a rockie mistake with the diameter of the hole for the switch.. used the outer size not the inner. So a quick print of a washer solved that problem.
Then I got a little carried away and ended up wiring it all up. So the intake fans are fully functional now. 
I'll now have to wait for the other parts to arrive in a few weeks.

20 September 2021

Resin Printer Fume Box / Cabinet continued

 Overnight the print of the power cable cover completed and it fits perfectly.  So pretty happy about that. It will be the last thing to actually get fixed in place.


Tonight's effort I designed up a small switch housing box to hold the toggle switch and cable connectors that will controller the intake fans. And I'll make a second one for the interior LEDs once the switch arrives in the post.


19 September 2021

Resin Printer fume box / cabinet

 Today I continued work on the fume box / cabinet for my resin printer. I mounted the magnets for the doors first and completed sealing up the joins with PVA, then proceeded to sand everything down nice and smooth. I plan too, at some point once we are out of lockdown to get some varnish for the whole box, but for now it will just be naked plywood. I then designed up a mount for the two 40mm fans for the intake vent and printed that off. A bit of mucking around and a bit of sanding and I had it all mounted, although it isn't level, but that doesn't matter to much. (My jigsaw technique needs improving)  Mounted the interior hood for air flow direction and the exterior vent cover, then tested it all.


Also added the door knobs I printed overnight.


Discovered that the exterior vent really generates noise, so I'll have to have a play around with some other designs and see what suits the setup best.

Now I'm onto designing the switch box for the fans and LED lights.

I also created a little cover for the power cable hole, which will print over night. Once I cable up the interior of the box and run the main power lead out of the box, this will screw in over it to hold it in place and reduce most of the air escaping out around the cable. I'll cut up a rubber washer and clip that over the power cable on the outside with should seal it up nicely.