So I've just managed to complete the 6 Fatties for the Judge Dredd games tomorrow. Just now finishing off the Fat Fans to go with them. Thes guys and gals are all 3D resin prints. Should be good fun to play.
![]() |
| Judge Dredd - Fatties |
The important things in life ....
Painting and playing War Games, Photography and drinking Scotch
So I've just managed to complete the 6 Fatties for the Judge Dredd games tomorrow. Just now finishing off the Fat Fans to go with them. Thes guys and gals are all 3D resin prints. Should be good fun to play.
![]() |
| Judge Dredd - Fatties |
The guys at
the gaming club are wanting to roll out some Judge Dredd next month, a game we haven’t played
in very long time.(9 years or so I think) So I went and found some Fatties to 3D Print for it and hopefully
should get them completed in time.
3D files from PAPSIKELS MINIATURES - THE METAHUMANS JUNE 2021
Work in progress...
I finally got around to getting a new web camera for my 3D printer setup that works with the Reality Sonic Pad. I discovered the Nebula Camera by Creality which was pretty much plug and play with the sonic pad. What I didn’t realized when I purchased it is that it had night vision which is actually really really good. A bit more expensive than my other web cams, but easy of use and timelapse are really nice so definitely thumbs up from me. Only thing they could do better is give some optional mounting brackets, so you could mount it to a wall instead of just tripod mount. But really I’ve got a 3D printer, so pretty sure I can manage to make my own wall mount bracket.
![]() |
| Nebula Camera - with LED's lights on |
![]() |
| Nebula Camera - LED lighs off |
Yep, almost broke my finger the other day, thankfully the fan
gave way and broke first. I was adjusting the position of my resin printer in the
cabinet after doing a bit of cleaning and managed to accidentally put my finger
to close to the fan, which clipped my index fingernail. After a lot of cursing
and swearing I checked the fan, it had broken off a few blades along with a
good chunk of my finger nail. To my surprise no blood, just a nice black and
blue finger tip a day later.
New fan ordered and installed… with a guard this time. …my
wife calls it experiential learning
I just call it was it is …. “ F@#$%ing idot”
With the addition of AK paints to my collection I
found that storage has become an issue, since my existing storage rack didn’t
fit them, thanks to the large cap on the AK bottles. After a bit of searching
around online there wasn’t a lot of options, so I started designing my own to
take all three brand that I use, Army Painter, Vallejo and AK paints. After
printing off a few squares with different diameters I figured out the best diameter
for the front and back support. Did a couple of test prints of a holder for one
bottle then used the scale to a whole row of 10. Still needs a little adjustment as I keep
forgetting about the PLA expansion and end up sanding parts back a bit to make
them fit. Overall, I’m happy with the diameters and the slight drop from front
to back to help keep the paints in the rack for when you bump the desk etc.
Last thing I need is paints falling onto freshly painted resin miniatures. So
one more test print before I expand out to printing a rack of for 50 paints.
![]() |
| Front View |
![]() |
| Back View |
![]() |
| Clos up of Front and back |
Work in progress on my current model from Ronin Arts Workshop - Goth Girl Itza. Had a real issue getting the arm join right. The resin I'm using has a bit of expansion and the parts didn’t fit well, needed a bit of sanding and putty. This photo of the base colours really shows it up. Think I’ll need to put on some tattoo designs to help hide it.
I finally got around to finishing off and mounting the Masina Island Rogue model. I had picked up an odd ball offcut from some wood from my father some time ago had that I knew one day I'd find a use for it in a base. It fitted quite nicely with the model.
I decided to use most of the offcut and leave the base
rather large for the one model. With the intention of finding a monster or some
type to have at the base is a challenging style pose. I'm been thinking of
maybe a lion or big cat of some type. Yet to find a model suitable. But
very pleased with the outcome

A busy couple of weeks with work and family stuff, but
today I finally got to finish off the pin-up set Ridia and Chrysi which I
started some time ago. Quite a learning curve with using different paints and
having them react to each other creating a bit of cracking in the sink. In the
end I just left it as trying to fix that would be a complete start from scratch
and I decide it wasn't bad enough for that. Still got a lot to learn on the
airbrush, but the biggest thing I learnt from doing this set was I need to improve
my painting mounts to hold the parts as I paint them. Ended up losing a finger
on one of them due to poor mount and dropped a part breaking off a finger. Models are by Hector Moran @ RoinArtsWorksop.
![]() |
| Ridia and Chrysi |
Finished up 3D printing my chisel shelfs today. These are for all my
Flex-cut chisels for carving that I use for my woodcut and lino prints. A
pretty simple design overall, that I managed break one when I tried to drill a
couple of the holes slightly larger to accommodate my latest acquisitions. Nothing
a bit of super glue couldn’t fix.
Makes it way tidier and easy to find the right tool when needed, plus stops
me knocking them onto the floor and impaling my feet ... which I've managed to
do twice now.
I signed up to Hector Moran @RoninArtsWorkshop to get a few models to test out and improve my airbrush skills. Still struggling a little bit on the paint consistency and getting that just right every time. More practice needed and more often I think will be the trick.
So spent a few hours playing with AK paints and skin tones and mixtures of flow improver and thinners. It's quite amazing how different colours need slightly different mixtures. I think I'm slowly getting better.
This is the NSFW version - 3D Printable Ridia and Chrysi - Double Pin-Up (NSFW) Set by Hector Moran (myminifactory.com)
Did a tiny first print to get the settings for the new PLA and then a larger print only 3mm thick at full size and the result was awesome. Using the Poly Lite PLA Pro the first print came out ok (needs a bit of tweaking in the printing settings) but fit the existing cog almost perfectly when doing a free hand rotation.
I'm sure it will need more work once I get it put together on the full mangle. Worst case is I will have a nice template to give a fabricator to make once from stell for me. But I'm hopefully that a 3d printed one will be good enough for the pressure I'll be putting thought the mangle.
After testing my light arch for
a bit, the direct light coming off it was a bit blinding, so it needs a shade.
I design a simple little shade to test in tinkercad online and will printed it
off to test it out.
I did a small bit only 20mm high
to test the sizing and a few parts with angles, once I get those printed and
tested then I can print the long lengths. Meanwhile good old Octoprint updates
have broken my led setup in my printing box, so will have to sort that out at
some point.
Also printed the base with a
full back to airbrush a background on. It came out ok, part of the curve is a
bit rough due to the stepping of FDM printing, but nothing a light sand won’t
fix.
So my fantastic wife got me an awesome birthday present the other day. The Figures FAQ from AK, so that gave me the idea for the base for Masina, the book as some awesome images and ideas in it not to mention all the notes and tips, I can foresee it getting well used and worn. With my limited skills, I thought I'd make one in Thinkercad online and print it. I'm going to try out painting a background for her. So just kicked off the print job which will take 8 hrs, all going well I'll have a base come morning.
Got
a bit more done on her, added a satin varnish coat to her help protect and
assist cleaning up my mistakes that are bound to happen when I get into the
detail work other belt and jewellery Aso trying out using the pencils from AK
for around the eyes and face paint.
Trying to work on my airbrush
skills and improve my control I've been running into some paint flow issues and
getting varied results and problems. Having a much greater success now I've got
my mixing in of thinner a lot better, I thought I'd try out the Flow Improver
that just got released by AK. (or at least just landed in my local hobby store)
So far after the base skin
tones put down on this model, I'm in the I have no idea if it helped or not
camp at the moment. I had less issues this time and maybe I just picked them up
sooner and my practice is starting to pay off. I think more time on the brush
will be needed before I can come to any conclusions. But at this early stage it
hasn’t hurt using the Flow Improver.
The model is from "The
Dragon Tappers Lodge"
3D Printable Masina Island Rogue - Presupported by The Dragon Trappers Lodge (myminifactory.com)
Also just done some youtubing on the Flow Improver options and how others use it, so have some more experiments to try out using less thinner and more flow improver.
Back onto my large diorama, I’ve moved onto the other mechanic. I've been enjoying using the AK paints I got for skin tones, so have got the pastel box set from them since I don’t any colours close to pastels. Tried out some on model wet blending with mixed results.
The
model itself is a bit rough, her back is a bit pocked with support marks… a
learning curve in how not to do resin supports.
Happy with the paint work on Lechy, I've moved onto the basing for him, Due to his feet and the flat surface of the wood I've decided to go with a strong steal pin (actually a drill bit) to secure him to the base, otherwise I risk damaging the feet trying to mount him. The plan is to add a bunch of leaves on the ground and cover it up somewhat along with adding some leaves to his branches. The base itself needed a good sand back after my resin leakage, then a polish and it came up really nicely.
Lechy is coming along nicely, slowly getting better with my airbrush.
After the success with the AK concreate, I had picked up an odd offcut of a bit of Kōwhai from my Dad that I thought would make a cool base for something. So got some two-part Water Resin from AK to give it a go. Learnt the hard way that you need to make sure the thing is really well sealed your poring into. Ended up have some resin spill out the side though one of the nots in the wood. Nothing major but a bit more to clean up.
Once I started on Amanda Pistons and watching a few videos online I got enthusiastic and thought I try out a full-on diorama and get away from painting war gaming minis for a bit. The plan which has morphed a few times as I build it. Basic idea was to have a cyberpunk style garage. First up was some oil barrels. Again upscaled off some models from 3D Printable Oil Drums by Marián Corvis Kronauer (myminifactory.com)
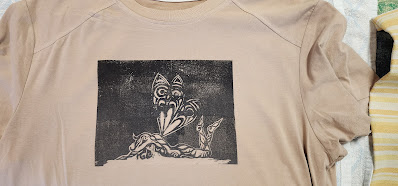
After some hit and missing printing onto the t-shirts I did some more research and ended up getting myself some Essdee fabric inks along w...