20 February 2017

Into the Jungle

Yesterday saw 
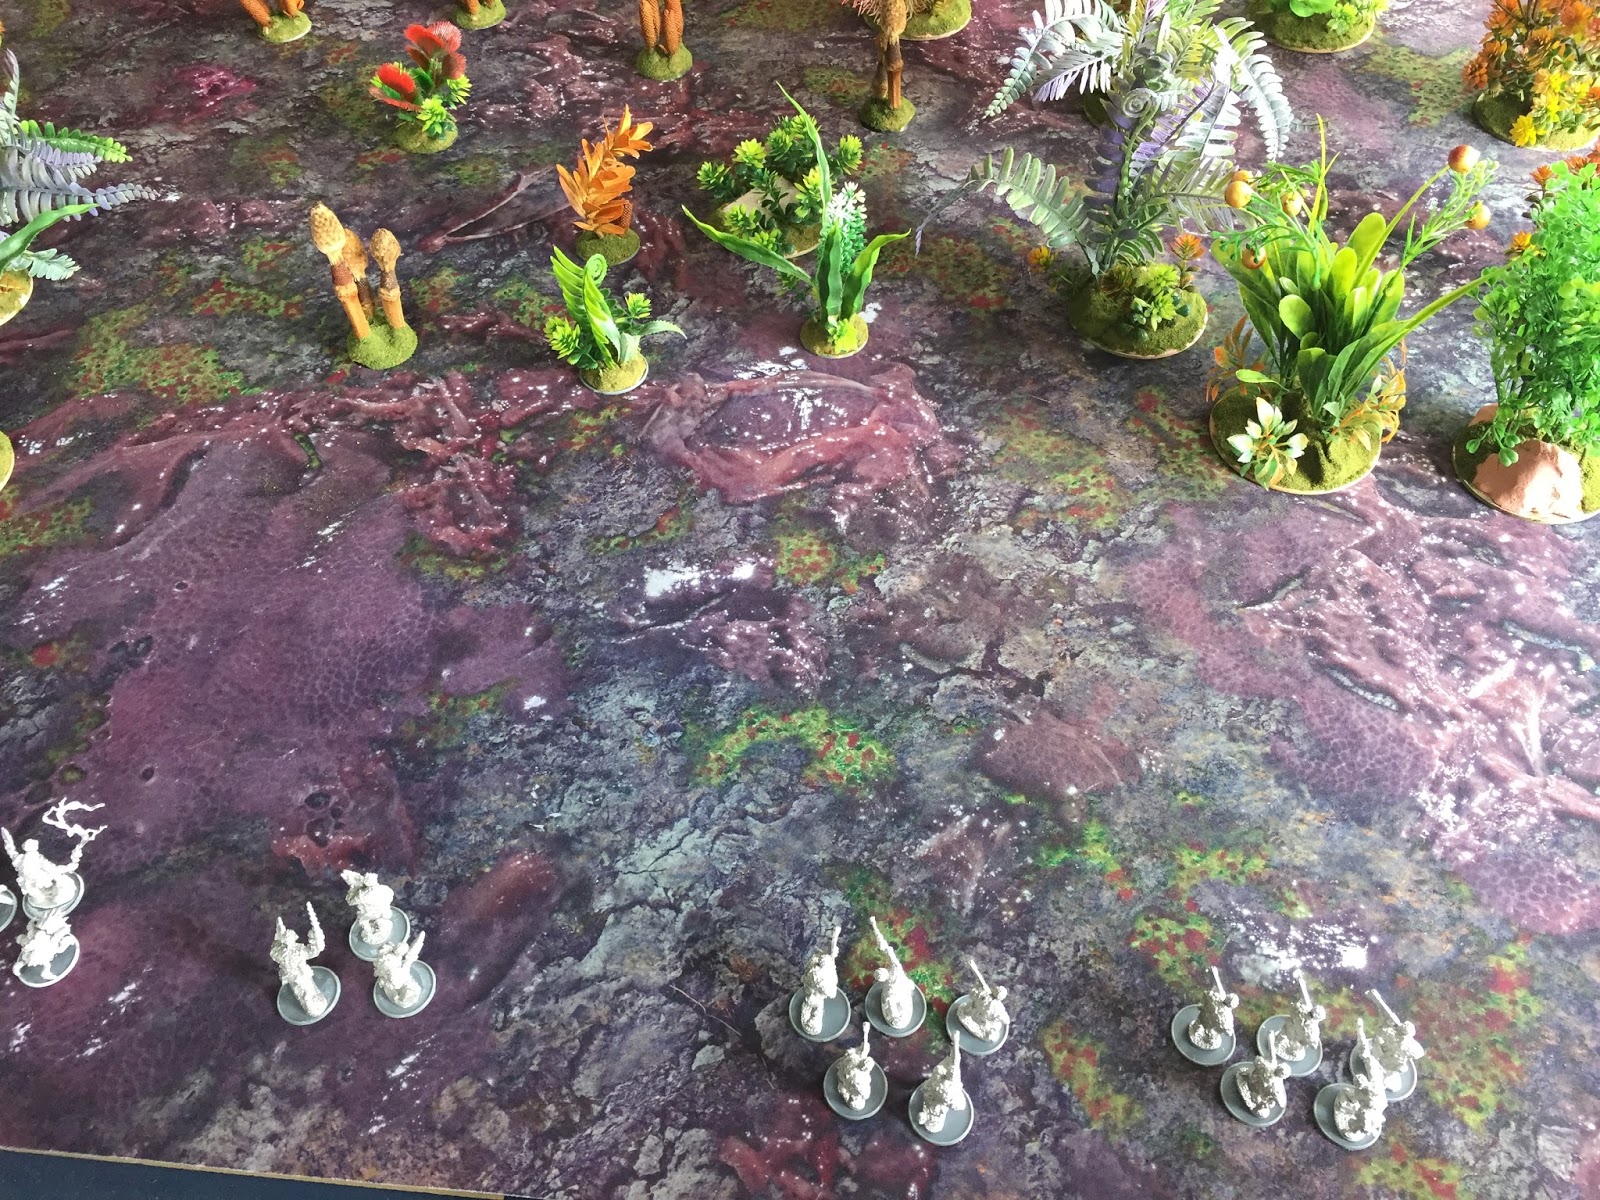
Mark and I get in a small game of Beyond the Gates of Antares on my nice new Deepcut Studio alien planet mat, along with my home made jungle terrain. As Mark 
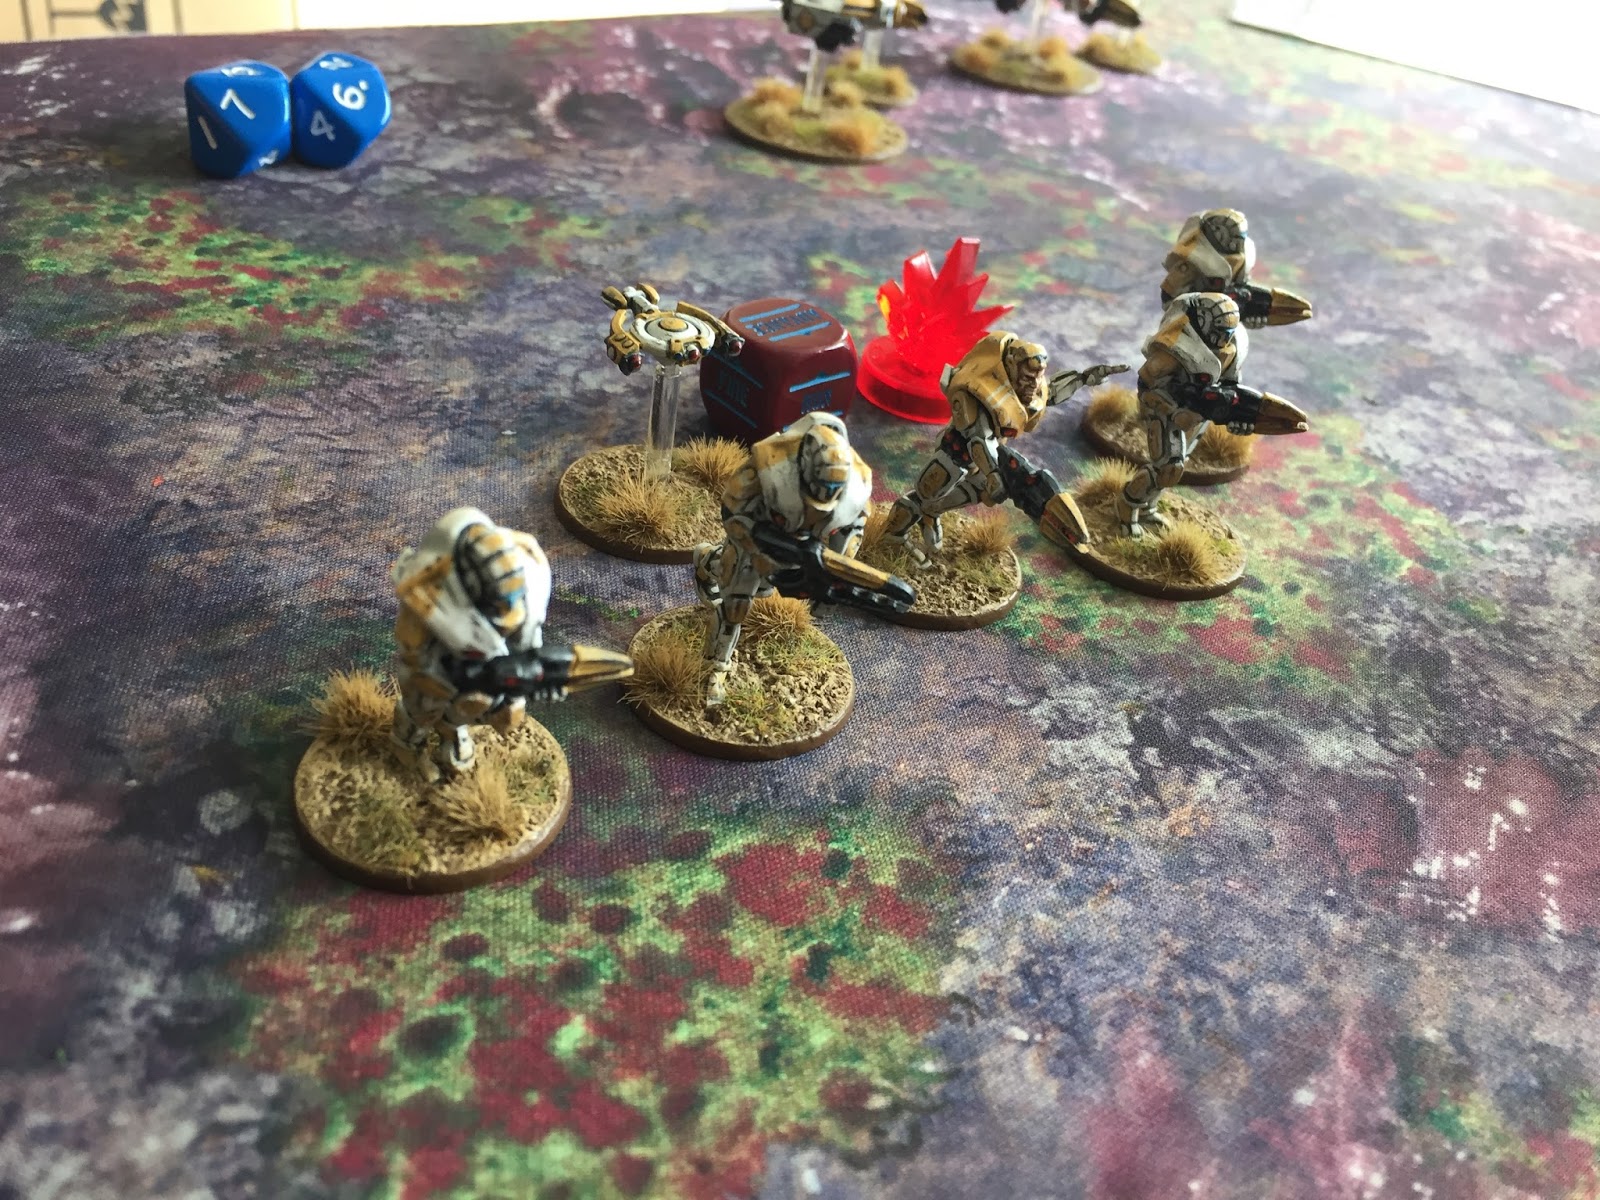
was a bit sick of my butt kicking Ghar army, I fielded the 514 points worth of Boromites I had put onto bases. This being my first game with the Boromites It was also a good little learning curve for me as well. The game started good for the Mark with his Concord, there superior range paying off in the first turn. Then a couple of bad choices by me and the Boromites got a right old rogering. With half of my units (all 5 of them) getting dusted quickly. I came back a bit when I got my Lava mites into combat, but ultimately I got wiped out. A fun little game on my awesome looking table. I'm really pleased with how the jungle terrain has come out. Just one more dusting of flocking around the base edges and they will be complete.


I just need to workout how I’m going to do the area terrain edges for the jungle. I’ll have to do some testing with bits of clear acetate or other type of plastic so the alien mat image shows through, then use the jungle terrain in the same fashion as you normally use trees on forest area terrain.

With Hail Caesar coming back to the club next month, my greeks are back out looking for more paint, so it going to be a busy month of painting.


14 February 2017

The Jungle

With my Ghar now finished, I've started on putting together some Sci-fi terrain to make the games more themed, especially if we manage to get the campaign going.

The first thing I have to say is my wife rocks! She was out doing some girly shopping over the weekend and I get a message "Found some plastic plants..do you want .. $2" . So $12 later she arrive home with six different plant bunches.

Add in some cheap FAS clay, a few old bases and coasters and a small jungle is made.


I also had some old seed pods and a dead branch from one of the trails I've taken to running lately. (they are the brown ones on the left) They will get a lick or two of paint once the clay drys.

12 February 2017

The Ghar

So today I finished off my Ghar army for Beyond the gates of Antares. Pretty sure this is a record for me painting an entire army, from the first purchase to fully painted in exactly 2 months to the day.


My army also includes some Rebel Ghar units, which I will build up if we keep playing, keeping the same colour scheme so I can run either army list.  


With this lot I can run a list 1750 points, or do a 2000 point list by bulking all the units up with their respective unit options. 


I've also created a massive excel spread sheet as an army builder. I've currently got the Ghar and Boromite armies all setup and working, with unit option selections, points calculation etc. It's been a mind bending experiment into excel logic and advanced formulas, but it was a good little challenge for the brain and good training for me work wise. It's still got a long way to go with getting the other army list into it. I'm pretty pleased with the outcome thought. 
Look forward to getting some more games in and also for my Boromite army to arrive so I can start work on them.


11 February 2017

The Battle of Chancellorsville

This month at the South Auckland Gaming club meet, we had arranged a large game of ACW, and a few of the lads were also playing Bolt Action. The normal practice FOG games were dropped due to Battle Cry tournament failing to get organised in time (which is a shame) 

Saul had done an awesome job of organised the scenario, “The Battle of Chancellorsville of May 2,1863.” for us. 

We laid out the large table roughly according to the map and organised sides
Saul and Mark took the Confederates while Brian, Glen and myself ran the Union troops.
 
The battle map
Leo dropped in and lent his models to the union side, but wasn’t able to stay due to other commitment. (Big thanks to Leo as we needed them to balance out the sides)
Setting Up

deployment discussion 


The scenario called for the Union commanders to be running a command of only 7, while the Confederates had commands of 8 and Jackson of 9. Now that's not a big difference ,but it did make the union troops a bit harder to get going. Apparently that was quite accurate for the battle (Which I don’t have a clue about the actual history of t all) but it made for some interesting dice rolls.


Confederates advance

The setup was really different, with the union troops facing all sorts of directions to start with.

I got commander Schurz and the right flank to look after, while Brain took the center and Glen the left flank for the Union deployment

Both Mark and I had a hard time getting our troops to move by failing lots of command checks, in fact I failed 4 turns in a row to move anything. But thankfully the Confederates came into range and I got to shoot up a bunch,while managing to stay mostly intact.
Union troops pushing back the Confederates on the right flank

The game tipped back and forth for awhile and I ground the right flank of Confederates back into the forest all the while Glen on the right flank was getting massacred. Between Brain’s canons and my shooting we broke the right flank and Marks Confederates had to retreat, but the left flank was an all-out brawl which came down to the wire.

The end result was Glen’s troops folded and ran after taking the brunt of the assaults, then Brian's support also took a beating and finally failed breaking the Union army giving the win to the Confederates.
The Confederates push through on the left flank

Great game, although a little frustrating that I couldn't get my troops moving much.

Next month were back into Hail Caesar, so my Greeks get to make a come back to the table. 


06 February 2017

The victorious slaughtering Ghar

So we are about 8 games into Beyond the Gates of Antares now. My Ghar army has grown and I'm almost finished painting 1500 points worth in just over a month. Which is crazy good for my painting speed. So 2017 is shaping up to be a good painting year.

Sunday Mark and I got in two more games, in which we played the Return to Base Camp scenario. First up Mark was defending and I was attacking..or should I slaughtering. It was a very one sided affair as I mowed though Mark's Concord. I had taken a 5 man battle squad which turned out rather effective. Expensive, but very effective. So I'll be testing out running larger squads in teh next few games.


Having a better grip on the rules now, I'm getting into using more of the specialist weapons and rules and making good use of them. As Mark found out how nasty disruptor weapons are when you get two squads to close to each other.


After lunch we ran the same lists but I swapped to defending. This time Mark's Concord had alot more success, but still found it hard work against my Command crawler with Leader 2 rules, which saved it from destruction twice, much to the disgust of Mark.


I've also picked up the Gluper model from the campaign book, which I'm hoping we will actually get to run the campaign. Just started on him today with some base airbursh work


Then of course for Christmas, I picked up the Brood Mother from the Bormites, which are going to be my second army once I finish painting the Ghar. I held out this far, but couldn't any longer, just had to put it together to see it. It's huge, once you put it down next to a Ghar battle amour suit and a standard Ghar model, it towers over them all. She's gonna be epic, both in the painting and on the table.


It's not a good fitting resin model, with alot of green stuff required. Sure you could leave alot of the gaps, which they did in the photo on the box, but I didn't like that look, so went to town with the green stuff. The legs are also a mission, getting an even stance and wanting 5 good contact points out of the 6 legs, proved to be a bit of a challenge. One leg to go which will need a bit of surgery and pinning to get it to look right.