21 May 2024

Primed and ready to paint

 Got the mangle parts mostly done, all bar the legs paint striped and cleaned and now undercoated with CRC rust converter ready for a test assemble before I apply a epoxy paint coat. Still got some sanding of the rollers to complete, but they are getting close to finishing.


Very happy with the outcome so far, really looking forward to getting the legs finished and it put back together. 


20 May 2024

3D printing cog gears

 
 With a missing cog on the mangler, I decide that I'd try and make one on my 3D printers. A quick bit of research and I ruled out using resin as it just doesn't perform as well as FDM printed plastics. So then on to finding some tougher plastics for my FDM printers as I use mainly cheap as PLA for my models. I quickly found a bunch of videos on guys making gears from Polymaker, Polylite and Poly Max PLA. And my local supplier I get PLA from happened to have some. It was a lot more expensive than the usual cheap stuff I use for model making, but I need to strong enough to (fingers crossed) survive as a large 14 cm gear cog. I found this web site online to generate the gear STL files, which worked out way better than I imagined it would - STLGears.com | The Free STL Gear Designer

Did a tiny first print to get the settings for the new PLA and then a larger print only 3mm thick at full size and the result was awesome. Using the Poly Lite PLA Pro the first print came out ok (needs a bit of tweaking in the printing settings) but fit the existing cog almost perfectly when doing a free hand rotation.

I'm sure it will need more work once I get it put together on the full mangle. Worst case is I will have a nice template to give a fabricator to make once from stell for me. But I'm hopefully that a 3d printed one will be good enough for the pressure I'll be putting thought the mangle.


19 May 2024

Age of AI art

 Started playing around with AI generation using some of my very old photographs from art school days, the idea was to simplify them down so I can use them a base for some woodcut prints. interesting results, found that AI really struggles with hands, guess that will come in time. I really like the Saxaphone and the way it came out, will be a good challenge to carve that out.

Heather

Cara and the Saxaphone 


18 May 2024

Mad Scientist and a wheelborrow

Spent the day doing more electrolysis cleaning on the mangle legs, which have alot more paint and some really heavy rust on them. They will need another go now that I've remove a large amount of the top paint layers. I used the wheelbarrow which needed a little bit of silicon sealant on the inside bolts to make it watertight. 


  Got stuck in with the Dremel, sandpaper and a wire disk brush on  the drill to clean out the stubborn bits left on the other parts that the electrolysis and wire brush didn't get. Pretty happy with the results so far.

Also tested some of the CRC rust converter on a couple of small parts which worked really well, then hit them with some Epoxy Black Gloss spray paint. They have come up looking really nice, so tomorrow once the paint has hardened up fully, I’ll do a few scratch tests and see how it goes. Pretty sure the combo will work well, just not sure how many topcoats I’ll need to do.


15 May 2024

Light Shade

After testing my light arch for a bit, the direct light coming off it was a bit blinding, so it needs a shade. I design a simple little shade to test in tinkercad online and will printed it off  to test it out.

I did a small bit only 20mm high to test the sizing and a few parts with angles, once I get those printed and tested then I can print the long lengths. Meanwhile good old Octoprint updates have broken my led setup in my printing box, so will have to sort that out at some point.

Also printed the base with a full back to airbrush a background on. It came out ok, part of the curve is a bit rough due to the stepping of FDM printing, but nothing a light sand won’t fix.


14 May 2024

Further madness

  So today I kicked off some more electrolysis cleaning on some larger parts of the Mangle press, using a large fish bin. I'm still blown away on how easy this is and how effective it is for cleaning paint and rush off metal. You can see on the long bar in the photo that only half fit into the bin the difference the cleaning makes. Only took about 1 minute of scrubbing with the wire brush to take off the residue paint and rust.


I'll be on a mission tommorow get find more soda crystals as I've run out and the fish bin looks like something out of Toxic Avenger movie.


13 May 2024

Mad Scientist

 Well I went and won an online auction for a 80-100 year old washing mangle. 

The plan is to convert it into a printing press for my lino-cut prints and all going well it should be able to do etchings as well. Picked it up on the weekend... with alot of help to get it into the car. She ways in pretty heavy and took three of us to get it in and out of the car. The whole thing works to a point, but is rusty and dirty as and the ancient paint is.. well 100 odd years old. So after watching a few YouTube videos I decided to give electrolysis cleaning a go on the small parts to start with.

I feel like a mad scientist, que the work place hazard nightmare setup. Live current running though exposed copper wire. Anyway the soda crystal and water mix, 12 volts and some steel rods, and the magic just happens.


A quick soap and water scrub of the parts and then into the tank, power on and after only an hour in the tank the grime, grit and dirt started coming off and floating. 


After about 2hrs in the tank I took the parts out rinsed them and a 30 second scrub with a wire brush to remove the final little bits of paint. 

I can’t believe how easy it was, so later this week I’ll be upsizing the plastic box to a full sized fish dixie bin that should fit most of the larger parts. The leg frames I'll need to do half at a time, that will be another interesting experiment.

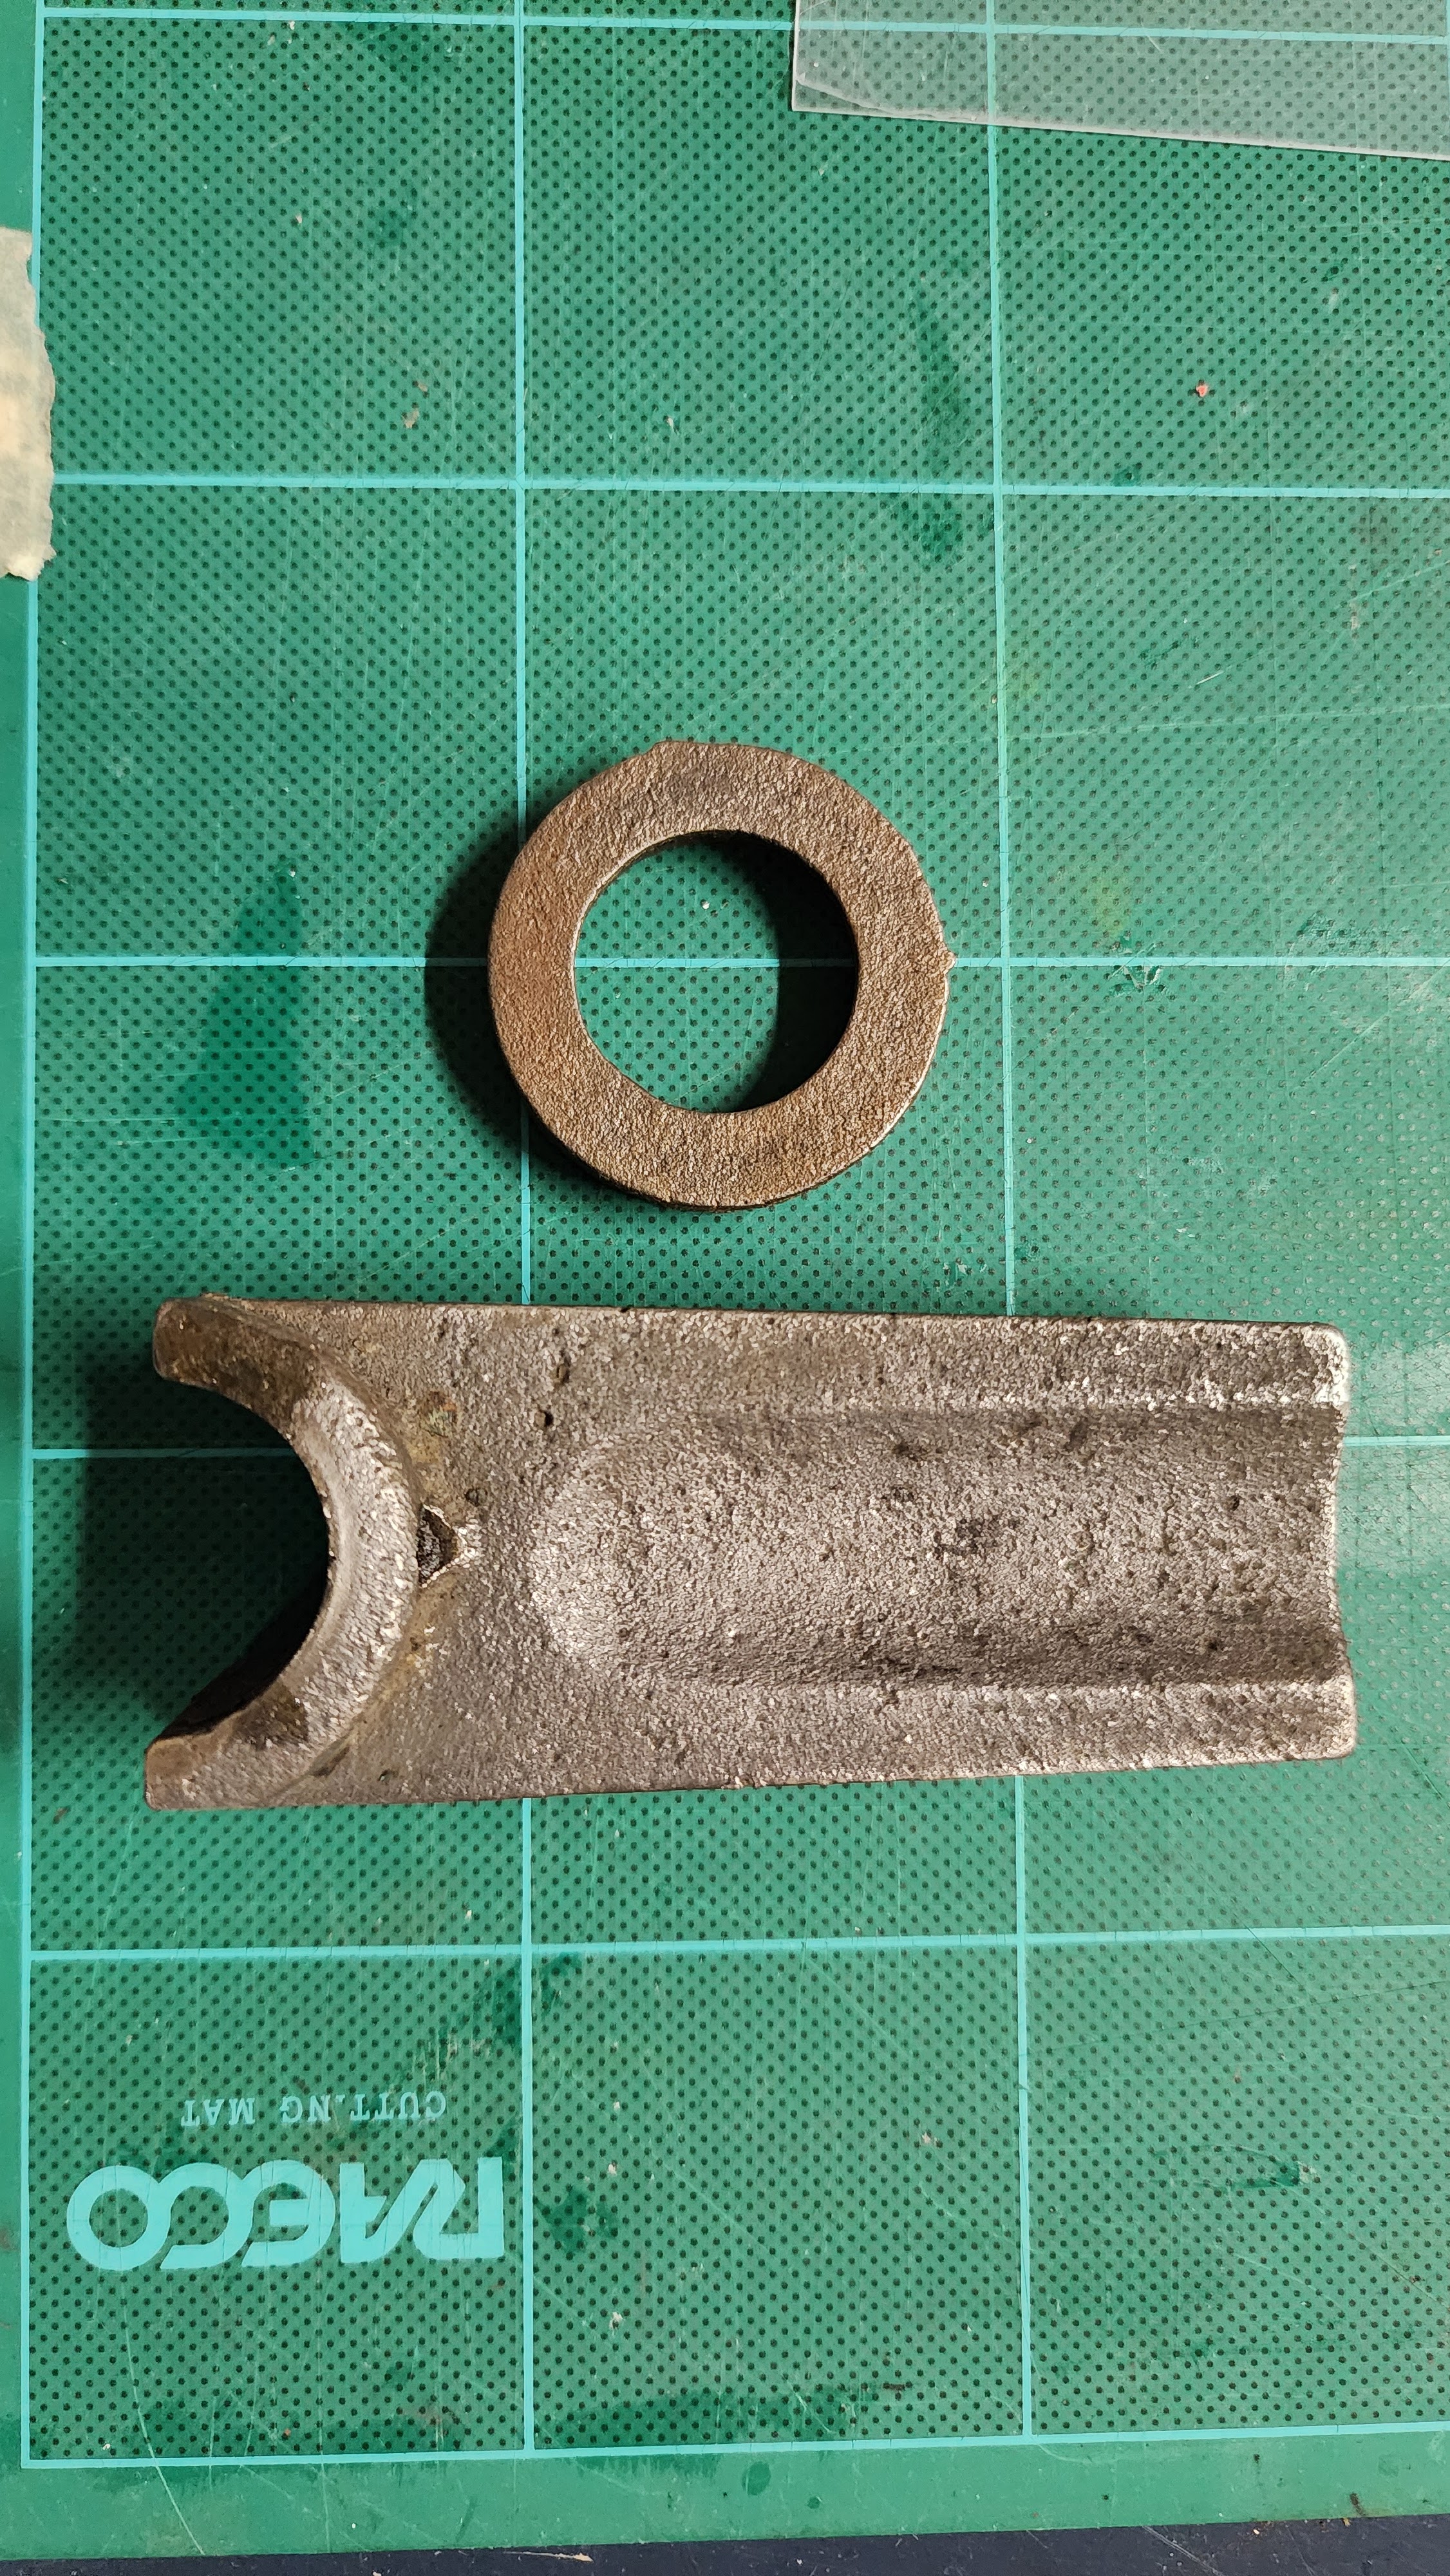
These are two of the cleaned parts that were previous painted and rusty as hell. 


11 May 2024

The light of Day

 I recently got an online subscription to Fantasy Figures magazine, where I saw the Green Stuff Light arch, which I thought was a really nice idea and I had been struggling in the last few months with good lighting on larger models. I thought I'd get myself one...couldn't find one for sale and when I did the shipping was going to cost 2 arms and a leg.  So I'm having a crack at making my own one. Now of course I'm not going to make a tinny we thing. Enter the 2 meter version


So my first test setup is working nicely, I'll need to make up a switch box and a better table mount system, but the idea is going to work.


10 May 2024

Masina : Progress and Base

So my fantastic wife got me an awesome birthday present the other day. The Figures FAQ from AK, so that gave me the idea for the base for Masina, the book as some awesome images and ideas in it not to mention all the notes and tips, I can foresee it getting well used and worn. With my limited skills, I thought I'd make one in Thinkercad online and print it. I'm going to try out painting a background for her. So just kicked off the print job which will take 8 hrs, all going well I'll have a base come morning.

FIGURES F.A.Q. – FIGURE PAINTING TECHNIQUES – THE COMPLETE GUIDE FOR FIGURE SCALE MODELERS.png

Got a bit more done on her, added a satin varnish coat to her help protect and assist cleaning up my mistakes that are bound to happen when I get into the detail work other belt and jewellery Aso trying out using the pencils from AK for around the eyes and face paint.


09 May 2024

Foliage : part 2

After soaking the leaves in the AK mix for 20 odd hours, took them out and placed them on some paper towels and dabbed them dry, then placed a few more paper towels on top and left them for a few hours, then I added a weighty box to the top of half of the leaves so I could compare what happens to them. Overall it only used about 1/5 of the bottle if that.


The ones under the weight flattened out really nicely and were easy to use with the leaf punch. The other were way more natural looking so that will work for stuff I'm not going to punch out like small fern fonds and actual sicks and branches.

It didn’t take long to punch a good amount of leaves out and the different colours so will now have to glue some onto my Lecky model. 


08 May 2024

Tree of life : yggdrasil

Something a little different for me, a drawing and ink of the tree of life - yggdrasil.

tree of life yggdrasil

It's drawn on some of my early handmade paper, recycling various papers from A4 used office paper, old magazines and the like. It's pretty rough paper and I've improved a lot since making this paper. The earlier prints I did on teh weekend workshops are on my newer paper.

07 May 2024

Masina Island Rogue : progress


 A bit more progress on Masina, not sure on the feather colours at this stage, they still need an ink wash. Also I broke off the dagger, so will paint and attach that last.

06 May 2024

Foliage

 While looking for some model leaves to add to my Leachy model I found this AK product to preserve natural plants so I thought I'd give it a try, at $21 from the local store it's not breaking the bank and if it works well, I have an entire forest behind my place to source materials from so it could turn out to save some money. So on my evening walk tonight I collected a bunch of autumn maple leaves of various colours, along with a few varied petals from some flowers. Soaking them in the liquid for 24hr in an old takeaway container.

Will see what happens in a few days after I dry them, and try using my leave punch.


05 May 2024

Pronto Plate Printing

 Went along to another workshop this morning at Printopia Festival, this time it was a class on Pronto plate printing, something I had no idea about. Quite a different method of printing compared to Linocut printing. Very cool process and the detail you can get is awesome. 

I used an image I created online using AI and then edited in photoshop. Then edit again once on the pronto plate.


American Indian - Pronto Plate print

American Indian inspired - Pronto Plate print


04 May 2024

Lino Print Workshop

 My wife got some tickets to a local Printopia festival for a couple of workshops. So this morning I spent it at the first one, which was a Intro to Linocuts. Having been doing Linocuts for some time now, actually seeing others doing it and different techniques was great. I picked up several very helpful little things and I got to use some actual nice large presses to print my image to a t-shirt. (much easier than doing it by hand pressing). The t-shirt didn’t turn out great, but after a few little tweaks post printing the t-shirt the couple of prints onto paper came out nice.


I then mucked around in the afternoon and did a second print

03 May 2024

The new Air Brush

 Well I've had the new air brush for just over a month now and I can truly say what a difference a good air brush can make. I've started out some 10 years ago with a mid-range cost air brush that is still serving me well and great for terrain painting. The I added a cheap Chinese knock off as a second brush to speed up painting large terrain a few years later. Then earlier this year I saw a few videos on airbrushing by some war gamers and started looking into what they were using to get such good results. 

In the end after lots of research I ended up getting the Infinity from Harder and Steenbeck which I managed to pickup on sale locally for a good price. Still not cheap but I'm more than happy with it and the results I'm getting are just getting better all the time. With it being easy to use and clean, I'm using it more and more and with all the content and online videos these days, getting over issues and picking up tips and tricks is so much easier. I see it becoming my go to for a very long time.

harder and steenbeck Infinity


02 May 2024

Masina Island Rogue: WIP

Trying to work on my airbrush skills and improve my control I've been running into some paint flow issues and getting varied results and problems. Having a much greater success now I've got my mixing in of thinner a lot better, I thought I'd try out the Flow Improver that just got released by AK. (or at least just landed in my local hobby store)

So far after the base skin tones put down on this model, I'm in the I have no idea if it helped or not camp at the moment. I had less issues this time and maybe I just picked them up sooner and my practice is starting to pay off. I think more time on the brush will be needed before I can come to any conclusions. But at this early stage it hasn’t hurt using the Flow Improver.

The model is from "The Dragon Tappers Lodge" 

3D Printable Masina Island Rogue - Presupported by The Dragon Trappers Lodge (myminifactory.com)


Also just done some youtubing on the Flow Improver options and how others use it, so have some more experiments to try out using less thinner and more flow improver.

01 May 2024

Year of the Dragon

I did this print for the Chinese Year of the Dragon. A larger lino-cut print that I did earlier this year in black ink and then the other day added some colour using my airbrush. And yes it says "Dragon" in Japanese as this print was actually a second I was going to throw out and was testing my separate lettering stamp (in red) for another print I’m working on, along with testing out the airbrush colour. End result turned out way better than I was expecting , so pretty pleased with the outcome.

Dragon Lino-cut print with airbursh colour