22 February 2015

The Wooden Spoon

Oh yeah … nothing like getting the wooden spoon at a tournament.

So Battlecry 2015 event was held at a new venue, the Remuera Bridge Club. I believe thanks to our lovely council hiking the costs through the roof for the previous location at the ASB stadium…..(insert large amounts of colorful language about Auckland City council…bleep … bleep … money grubbing …..bleep bleep ..bulling …bleep .. bureaucrats … yes they aren't my favorite people )

A much smaller venue saw alot less things happening, but not that I ever got to see much else as I’m normally playing in the Fields of Glory tournaments anyway. I found it alot cooler today once they got the ceiling fans going, so that was a big bonus as the ASB stadium got crazy hot in the afternoons. Space was a little tight, but nothing to crazy. So all in all a good location and close to some nice cafe's to get my caffeine fix.

With the usual suspects from the South Auckland Gaming Club there, and a bunch of others from down south we had five tables going. The opening round was
Players

Arthur Young  vs Stephen Ladanyi
Kevin Carberry vs Richard Jeffrey
Cavan Orsbourne Vs Richard Woolford
Bryan Orsbourne Vs Scott Gallagher
Robert Wood vs Ian Doel

So yesterday I played Ian up first,who I’d never meet before. A really good game which I got totally wiped after a few awful dice rolls at the wrong times and as well as Ian being a very good player.
My second game on Saturday was up against Cavan with his Spartan army .. Oh my god .. the Orsbourne Dice rolling machine of destruction versus my dice rolling (an armless leper could have rolled better than what I did)… safe to say I got completely wiped out.

I never took many pictures,I was too busy getting slaughtered. :-)


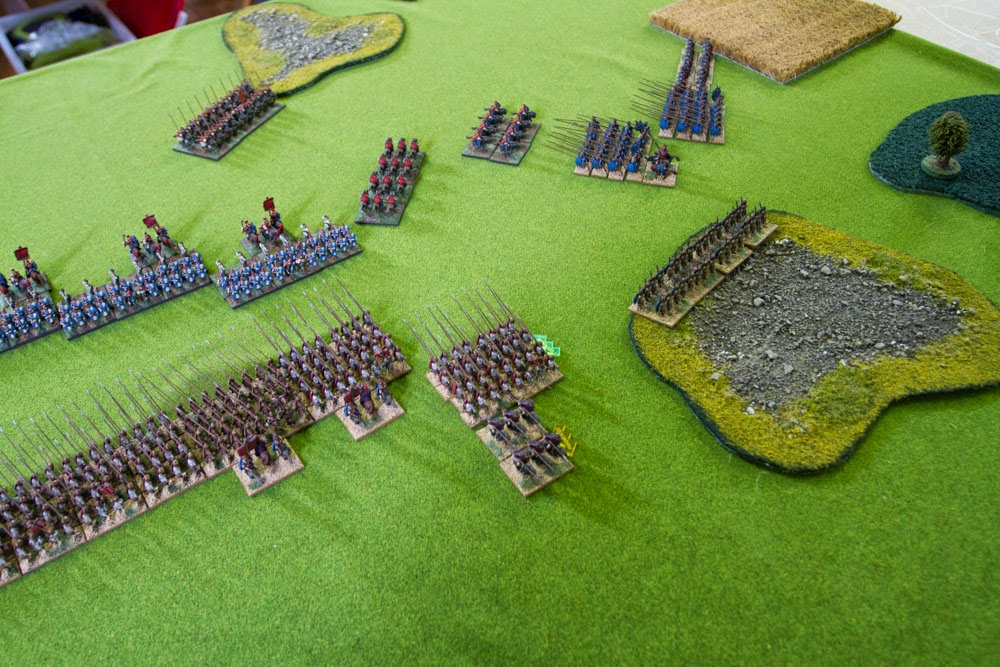
Then today my first game was up against Kevin, who I had borrowed the Ptolemaic army off. So he got to play against his own army. At that stage after day one, the both of us were at the bottom of the points table. The dice rolling continued to be epically bad for both of us, but my lack of playing with the army showed, and Kevin changing his tactics and using his chariots effectively saw me crumble and then collapse in a spectacular fashion. (It was rather funny in the end)

Then the final game was against Scott with his Gallic force. Last time I played Scott he lost pretty much purlly on bad dice rolls. This time the match up was going to be alot closer as long as the dice behaved.
As it turned out the game was very close ending with Scott taking an early lead and my pike making hard work of in middle of the table. In the end it was a draw with Scott taking 12 points from me and I got 8 from him. By far my best game and also the most enjoyable. A close game is a always a good game.

A great weekend gaming done and dusted. Even if I got the wooden spoon

Thanks to Kevin for being the umpire and also lending me his army.  And thanks to Glen and Bryan from Battleline Miniatures for sponsoring the tournament.

14 February 2015

FOG Practice

Another cracking clear hot summers day for our monthly South Auckland Gaming club day. With the Battle Cry 2015 tournament next weekend, FOG Ancients was the game of the day so we could all get some practice in. Especially for me as I’m borrowing an army to play in the tournament since I didn't have one that fitted into this years theme. It was my first games with the army today. (thanks to Kevin for letting me borrow them) A Ptolemaic list of lots and lots of Pike, of which I’ve been on the receiving end of a brutal beating from Kevin when he used them against my Vikings a few months back.

First up was a game against Bryan with his Romans. Having not played FOG in quite some time the rules were in the usual rusty state of mind, and a few mistakes were made in the first game. It was an unusually brutal game on Bryan as my dice were on fire,seeing a large amounts of 5’s and 6’s. Adding to that a few rules blunder made it a very decisive win to me. If we had of played the rule correctly,I think I would still have won, but not as convincingly. With my numbers I managed to do the good old pincer move and get around on both flanks which helped win the game.


Second game was against Glen, and more Romans. This battle was alot harder with Glen’s larger units making it hard work. Lucky for me a fluke dice role killing one of his generals helped make a big difference in the middle of the battle. Then an outflanking move meant that I managed to collapse Glen’s main battle line completely, which soon resulted in me breaking Glens army for my second win of the day.


A good learning curve for me with a Pike based army, as both games were very different. A few blunders made for sure, which I wont do next week… hopefully.

Looking forward to Battle Cry.

08 February 2015

Rebel Accounting

Today was the day, an Epic scale X-wing game. So many ship, so much destruction.Or that’s what we thought was going to happen. With so many ships on the table things must get destroyed fast.
Only half the ships

The setup
More Ships


So Lee and Mark.D joined me on the Rebel Alliance side, while Paul, Phil and Mark commanded the Imperials.

Will ran as the umpire and kept the game going.

Thanks to Will’s organising of the scenario: Here’s the game plan. (repeated off Will’s Blog)  Which he’s posted up a good write up as well.


Scenario

Play on a 6’ by 5’ table.
Scenario is Rebel Transports and Corvette are trying to escape from Hoth. Star Destroyers in the vicinity are out of action thanks to the giant boob gun on Hoth, but the Rebel forces can’t muck around as the Destroyers won’t be inactive for long. Imperial Tie’s are still very active though and a swarm soon emerge from their hiding places in a nearby asteroid field.
Rebel forces have to ensure the Transports & Corvettes survive long enough to be able to clear the local asteroid field and engage hyper drives. Imperial forces are trying to destroy all Rebel forces.
A large number of ships on the table are going to be a nightmare to keep track off/move/shoot etc and keep the game moving even with multiple players and numbered ships, so starting forces are….

Rebel forces:
2 Rebel Transports + 1 CR90 Corvette -> up to 250pts in total
1 escort squadron of up to 4 ships -> 100pts max

Imperial forces:
3 squadrons of up to 4 ships -> 100pts max per squadron
Each turn (starting on turn 1), both sides can bring on additional squadrons (up to 4 ships & 100pts max per squadron) up to a maximum of 5 squadrons for Imperials and 4 squadrons for the Rebels on the table at any one time. This is done in the end phase.
Squadrons can be withdrawn during the end phase of any turn.

Deployment:
Rebel player chooses a short edge of the table and deploys all ships first.
Rebel ships must be deployed within range 3 of the chosen short edge.
Imperial squadrons are deployed within 6” of the centreline of the table.
The Rebel side has Initiative.

There is no limit to the total number of squadrons available over the course of the game. Just keep bringing them on until the game ends!

New squadrons can be deployed from any table edge outside of range 3 of any opponent’s ships. They can activate as normal in the next turn. Ships must be deployed within range 1 of at least one other ship in the same squadron.

Named pilots/crew/ships and upgrades labelled as “unique” (normally indicated by a dot on the card next to the card name) can only appear once in the entire game.

When building your squads in the online squad builders, please note that pilots & upgrades etc. that are unreleased should not be used.

We will use cards for the CR-90 & Transports to manage and allocate energy.

A small asteroid field (12 asteroids) will be set-up in a section 4” either side of the centreline (short side). Asteroids are placed 1 at a time by each side and must be outside of range 1 of any table edge or other asteroid. (We'll change this on the day if the set-up looks a bit naff).

Game ends after 10 turns.
Winner determined on VP.
Imperial’s get 5 VP for each transport/corvette section destroyed, 3 VP for each Rebel squadron destroyed, 1 VP for each Rebel squadron withdrawn
Rebel’s get 5 VP for each transport/corvette section that survives, 3 VP for each Imperial squadron destroyed, 1 VP for each Imperial squadron withdrawn.

So basically, we're going to have 3 huge ships on the table with something like 30 odd Rebel & Imperial fighters swarming around them!

So the GAME begins


Oh Crap!!! Here they come.


Wall of Death
Damn those Bombers are hard to kill.


Rebels deploy, and take up lots of table edge space and spread out to reduce the entry points for the Imperial flank attacks. The Imperials sneak in a squad of Tie Bomber’s on our left rear flank. Some heavy fighting takes pace and as the Rebels fail to quickly dispatch the Bombers. We sneak a squad of B-wings in behind the Imperial battle line but they are to slow to cause any damage and slow things down as we had hoped.

A few turns into it and they finally dispatch the bombers but take several losses from there bomb’s and after they inflict some damage on the first transport vessel.

The mass approach of the Imperials across the entire board comes up rather quickly and they sped through the asteroid belt.

A mass fur ball of a battle then erupts on the left flank and I start playing kamikaze with the huge ships as our firepower is just not making a dent in the Imperial ships numbers.

With ships everywhere the Transports start taking a beating along with the Tantive, and then there was some shenanigans….. (all unintentional of course).
“Thanks to the careful and ruthless planning of the Rebel Alliance spy who infiltrated the accounting depart of the Imperials (Who we shall name : Rob). His wide spread weapon budget cuts went unnoticed for the most part. This saved many Rebel lives and his rise through the imperial ranks continues. His accounting achievements of the past few hours will be immortalized in Rebel history”

I was trying to keep track of damage on lots of ships and had a brain fart moment, adding the damage to my shields instead of subtracting the damage … the poor Imperials cried foul play …. So the sledging began :-)


So after a slight adjustment of shield values we were all back into destroying each other, and for some strange reason the sledging never stopped.

The Imperials then hammered home there number advantage and took out one transport and the forward section of the Tantive.

Turn 10 comes around, and the Rebels are well behind on Victory points facing total defeat. I power up all the shields I can on both the remaining section of the Tantive and the largely untouched Transport.

After the final dice are rolled, the Transports survives as does the Tantive rear section, by only 1 hull point. Thus giving the Rebels the win by 2VP (or 1) cant remember. A win never the less.

Lot’s of fun, lots of sledging, lot’s of ships… not much dying though. A hell of a lot of fun. So thanks to the lads for an epic day.


I think this mass battle must be done again, with a few tweaks to the setup and less upgrades on the ships across the board, so things die faster.

05 February 2015

oh yes … it’s more Greeks

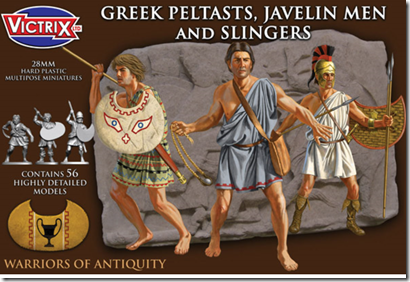
My last box of Greeks turned up a couple of days ago, a box of Victrix Peltasts. They are of course awesome models. the details are as I expected (awesome) and match in well with the other Victrix and Warlord Greeks I already have. So I now have all my models for my starter army for Hail Caesar for our March campaigns at the Club. So far I’ve only assembled a few of the new models, With the only gripe is the slingers, slings are rather fine and I broke a couple.  Not a major though as they had several options with arms. My rate of progress on painting them has all but stopped, with other distractions. But with a public holiday tomorrow I have scheduled in a couple of hours painting.
 image
With Sundays huge X-wing game fast approaching I spent  the last 2 hours sorting out all the cards and tokens and sorting out transport options and boxes for all my models…. God damn there are alot of tokens and cards and I only have 24 models. The game is going to be Epic. Watch this space for lots of pictures of the game.

And of course I found some more models at a local stare today, when I went in to pickup some card sleeves. I had to even up the odds in the D&D attack wing, so I picked up the Silver Dragon today, so I have 4 dragons now. The  models, spells and imagery bringing back all those memories of hours lost in other worlds and playing D&D as a young lad…I’m so looking forward to having a few games of this.
image

02 February 2015

X-Wing and Dragons.

So yesterday I got some actual gaming in and managed to get in two games of X-wing and lots of general chit chat about Infinity and the up and coming games. Both Mark and Will have posted lots on the games so I wont repeat that.

http://kiwi-colour-studio.blogspot.co.nz/
http://willsramblingsnz.blogspot.co.nz/

Plus I didn't even take any photos. I was to focused on learning how to die slowly using the Rebel Transports in preparation for next weeks mega battle. It’s going to be awesome, but rather difficult for the Rebels I think.


Then by accident I re-discovered the Dungeon’s and Dragons Attack wing. Which I had forgotten completely about, it’s just hit the third wave release. Now being a original D&D player and a huge dragon fan (tattoo’s and all) I couldn't pass on this after watching a few video reviews. So I collected the Starter box today and have just cracked it open.

Hmmmm… first annoying thing ..I discover they have given me Star Trek Attack wing dice … hmmm..not good… It will be interesting to see how Wizkids responds when I email them. From a quick look the dice will work fine in the interim, I’ll just have to work which symbol is which.

Now on the bright side the models for the Red and Blue dragons are really nice and well painted, the Cooper dragon is a nice model, but the paint job is a bit lacking. It’s basically just one color, not the two tones of like the Red and Blue dragons.

If I look at my Star Trek Attack wing models and compare the paint jobs, the dragons are way better, so a thumbs up there. Looking forward to try out a game.

Fabic printing

  After some hit and missing printing onto the t-shirts I did some more research and ended up getting myself some Essdee fabric inks along w...