26 September 2021

Assembling Smaug


The resin printer cabinet got some more work done on it yesterday, added in a centre flange to cover the join when the doors are closed and also some internal flanges along the sides behind each of the hinges to block any major light leaks. I've still got some clearance at the bottom so I can remove the spill tray should I have any disasters. Also bolted on the handles to the cover now that I'm happy with the setup as the valcro just wasn't cutting it.

I finally got around to start working on the Smaug print and putting him together. I discovered how much the print was out. That is the parts not fitting together and were well out. Which will be my printing settings and the expansion of the resin, something I hadn’t counted on. (I’ll need to learn more about that in the future)

So I got the good old Dremel out and found some sanding stone bits for it from the kit I had been given and tested them out on a block of resin I had kept from earlier mistakes. Once I had the right bits, I cleaned up the connection points on the model with some effort. Not having much experience with resin and sanding I took my time so not to break anything (including me). I discovered that it's a dusty process and a quick alteration to my spray booth cabinet had the dust going outside instantly. I just stappled up an old towel over the front of the spray booth with a slit up the middle so I could see and work. This was enough to create much better vacuum inside the box and I could see the dust rising off the model as I grinded it back.  Full breathing mask was mandatory of course, with resin dust you can’t be ignorant. So super stoked with the spay booth. All the effort I had gone to install the LED’s has really paid off. So, I’ve now got a sanding booth and spray booth.

With the joints in the model now a little out after the sanding, I’ll have to fill them in with green stuff and make a few alterations to the base to make it work. (All part of the fun)

This evening I’m trying out a resin mix of the last bit of green resin with some clear resin. It will be my first resin cocktail. I dont expect any issues as they are both from Anycubic standard resin range. More cyberpunks for Necromania, 6 models and a motorbike all at once.


23 September 2021

Test Results ... and more damn rain.

 Another 46mm of rain over night and the back paddock is flooded again, only slightly this time. Cant wait for summer ... although daylight savings is next week, so getting out of bed an hour earlier will be a mission. I'm seriously thinking of making a remote controlled boat, could be a good project for some winter fun.


On the bight side of things the printer cabinet is working awesome, first thing I noticed was the reduced noise level and reduction in smell, even thought he cabinet not yet vent outside the smell reduction was very noticeable. If I run the intake fans the noise level increased to similar to what it was when just running the printer on the bench. That seems mainly to do with the vent grill I currently have over it. Some more work and investigation into vent designs vs noise levels need, but that only minor in the grand scheme of things.

My setup for the toggle switch for the intake fans is working great, so looking forward to getting the extra switch's in the post and installing the LEDS lights.

Overall so far I'm pretty stoked with the new cabinet. The real test will be the extraction of the fumes out the window and how well that works. 

Painting wise, that's taken a back seat for a bit, but I've been slowly doing little bits on the gang and added in a firing arc on the bases to suit Necromunda


22 September 2021

The Big Test

 With the intake fan done and working, plus with the other parts a few weeks away I decided to setup the new printer cabinet and test it out in its current state. So with a hand from the wife we put it up on the workbench (gotta look after the old back these days)  where it will live. I cabled in the printer power and set up the resin printer. It was leveled perfectly ... share fluke on that part. 

Once the printer was in, I really showed that I need the interior LED's setup for sure, as the cabinet really cuts down the light even with both doors fully open. Of course that's one of the functions and reasons for the cabinet. Working space inside the cabinet is perfect, not to small and not to large to interfere with the aircon unit on the wall above the cabinet. 

Anycubic Photon Mono X and cabinet

I'm currently using an old servicing tray under the printer for drips and spill protection. I've used it for years for undercoating mini's. I'm sure its doubled in thickness with all the overspay in the 10 odd years I've been using it. I'll have to get around to getting something a little more cleanable once we are out of lockdown and shops are open once again.

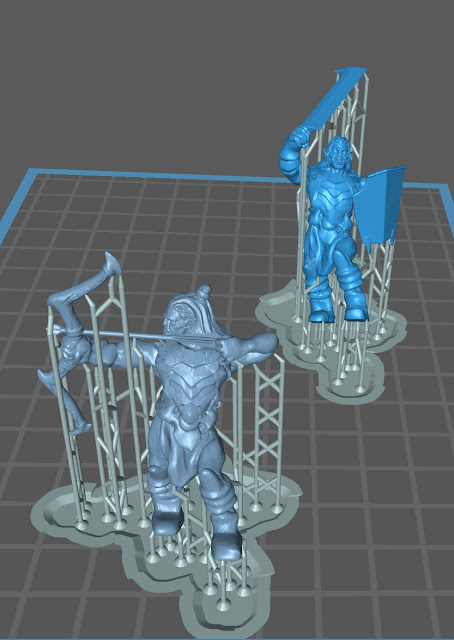
I've started on my clear bottle of Anycubic basic resin using the same settings as what I used on the clear green resin. And attempting to print these lovely girls to add to my Necromunda gang.
Hopfully the settigns arent to differnet... still got a lot to learn about the settings for the differnet resins.
Necromunda Escher Gang 3d printed models


21 September 2021

Wiring

Started working on the wiring for the fans and switch this evening. The switch box printed really well last night, but I did a rockie mistake with the diameter of the hole for the switch.. used the outer size not the inner. So a quick print of a washer solved that problem.
Then I got a little carried away and ended up wiring it all up. So the intake fans are fully functional now. 
I'll now have to wait for the other parts to arrive in a few weeks.

20 September 2021

Resin Printer Fume Box / Cabinet continued

 Overnight the print of the power cable cover completed and it fits perfectly.  So pretty happy about that. It will be the last thing to actually get fixed in place.


Tonight's effort I designed up a small switch housing box to hold the toggle switch and cable connectors that will controller the intake fans. And I'll make a second one for the interior LEDs once the switch arrives in the post.


19 September 2021

Resin Printer fume box / cabinet

 Today I continued work on the fume box / cabinet for my resin printer. I mounted the magnets for the doors first and completed sealing up the joins with PVA, then proceeded to sand everything down nice and smooth. I plan too, at some point once we are out of lockdown to get some varnish for the whole box, but for now it will just be naked plywood. I then designed up a mount for the two 40mm fans for the intake vent and printed that off. A bit of mucking around and a bit of sanding and I had it all mounted, although it isn't level, but that doesn't matter to much. (My jigsaw technique needs improving)  Mounted the interior hood for air flow direction and the exterior vent cover, then tested it all.


Also added the door knobs I printed overnight.


Discovered that the exterior vent really generates noise, so I'll have to have a play around with some other designs and see what suits the setup best.

Now I'm onto designing the switch box for the fans and LED lights.

I also created a little cover for the power cable hole, which will print over night. Once I cable up the interior of the box and run the main power lead out of the box, this will screw in over it to hold it in place and reduce most of the air escaping out around the cable. I'll cut up a rubber washer and clip that over the power cable on the outside with should seal it up nicely.


18 September 2021

Hobby room upgrade part three

Saturdays project was to build the fume extraction box for my resin printer, along with it being light tight since my hobby room gets a lot of direct sunlight. I had to adjust my plans slightly when I found I didn't have large enough drill bits for the 40mm fan intakes and being in total lockdown thanks to COVID, acquiring one would take weeks. Other than that no major issues during the build. It was my first time mounting doors and using hinges so a bit of Youtube watching before I did that.
 
At 1m by 600mm by 570mm deep, it's not small and made from 18mm plywood. Its solid for sure, and should also reduce the runinng noise of the printer a lot.
Top side hole is for 2x 40mm intake fans to pull air into the cabinet with an interior hood to deflect the air downwards which I've already printed. 
Then at the back, there is a hole for the power supply which I'll make up a cover for. Then the bottom central 120mm extraction fan. Which I'm going to hook up to a variable voltage/speed controller so I can reduce the speed, air flow and noise.
I've also put holes in for magnets to help keep the doors closed.

A fun project for sure, now onto the task of design and printing the intake and extraction fan holders, along with vent covers and the extraction tube connector. 

Oh, and a switch box to hose the switches I'll wire up to control the intake fans and LEDs I'll be putting into the box.

15 September 2021

Smaug print

 So I've now completed the Smaug print and and it's cost me $50.81 in resin. Which is just awesome, if you consider you need to pay $650 NZ dollars to by the Games Workshop version.

Now I just have to sand down the joints a little as they are a bit tight before assembling and painting.

I also spent some time and worked out the costs so far and put everything into a spreadsheet.
At this point having printed 68 miniatures, that's counting Smaug as one, and a little hovercraft for BattleTech which is tiny as one. Just keeping it simple, so  I'm at $33.03 per model, after two and half bottles of resin. I should half that by the time I get through my next two bottle which are included in that price.

Safe to say its not going to take long to justify the costs... not that I have to, but tis good to keep track of costs and see what the models I'm making are actually costing. The running costs are definitely more expensive than filament printing, but the results are just awesome.

I've just cleaned the vat again after printing Smaug's and his huge bases, along with 30 plus models, and its holding up really well now that I have the exposure time correct for the resin. 

These two cyberpunks are off my last print, the quality is awesome, and I'm sure I can actually get it better with more time and tweaking the settings..


12 September 2021

Smaug

 There is absolutely no way in the world that I would pass up the chance to print a red dragon, I mean I have one tattooed over my entire back, so of course I'm gonna print Smaug. And now I have the rule books and have committed to play LoTR …One must print a friendly red dragon.

Smaug
 

So far, he’s coming out great. I even learnt how to put holes in the models and print them hollow which saves a lot of resin.  I’ve still got the legs (currently printing) and the very large base to go…. So I’ve extremely happy with the printer at this point of its early life.

And for scale, a standard hero model I printed and started painting for Necromunda at 32mm.


11 September 2021

Hobby day - Upgrade part two.


Once that was complete, I got stuck into printing and also some painting. I’ve now printed enough for two gangs for Necromunda. Although I’ll probably need more models with different weapon options.


Completed printing, green stuffing and undercoat the Gorgoroth for Lord of the Rings. I printed it on my FDM printer so a little warping on the print bed meant it needed a little green stuff to fill in the gaps. Overall I'm pretty pleased with it. 


09 September 2021

Hobby room upgrade

Today's effort I built myself a new under bench shelf for my hobby room. This is to hold the trays and tools for processing my new resin prints. Plus it was also a trial run on using the plywood, before I tackle the larger job of building cupboard with air extraction for the resin printer. It still needs a proper sand and then some varnish, but it's gonna do teh job nicly.


I've also now got my settings pretty well turned in for printing minatures with the green anycubic resin. Still havent got the eSun water washable resin setting quite right yet, alot more leanring to do on that front. but so far I'm really pleased withteh resin printer. 


08 September 2021

Onna-Bugeisha and Calvary

Face painting, one of my least favourite parts to paint as I've never really been any good at it. So I've started to force myself to try and improve, since the faces on the Samurai army I'm working on are so nice. 


Also just finished off my Samurai Calvary on my river themed bases. I'm pleased with the bases, but not so much with the horses paint job. Always room for improvment.


07 September 2021

Magnetzing

 Some of the guys I know have been magnetizing their models on the bases for awhile now. I’d never found an easy way to find large bits of tin or similar metal for my transport’s boxes at a reasonable cost…. Until now. Having just moved into a new subdivision, there have been a bunch or large for sale house signs around that have been dumped into rubbish skips. Turns out they are awesome for using as large base plates in my plastic storage containers.  So I picked up some cheap magnets rounds that are nice and thin and come with a stick on adhesive.

So I’ve just been through and magnetize all my Zulu’s and also ¾ of my ACW Union army. Since we are in lockdown I’ve run out of magnets, so I’ll have to wait a few more weeks until we are released from our home detention.


ACW Union Army


Works a treat and will make transporting them to the club so much easier.


06 September 2021

Necromunda ... Old School.

 Yep, that’s right , the old school version of Necromunda has made a return to my shelves, after I found a copy online along with the source book. I just couldn’t go past it. Both books have now turned up and are in very good nick considering their age, so I'll be digging though all my old models to find if I have any left and then printing off extras that I'll probably need. 


No guess if what I'll be going for first ... House Escher of course.


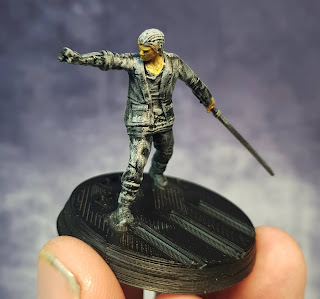
I've been busy testing and learning how to use my new Resin Printer, currently using this nice Cyber punck sniper as my test model.


On the LotR, I moved back to my FDM printer to do the Gorogoth, as the actual size was way bigger than I expected, and at the full size, printing in resin just didn’t make sense, plus I still need to learn heaps more before tackling large prints in resin.

I have got alot further with the setting and setup, so I'm getting half decent prints now in resin and I've got my process of cleaning and curing down. So much to learn, but its a good kinda of learning.


04 September 2021

The Good, The Bad and the rather Drinkable drop

 Now that I'm over the shock of the flooding (The Bad), we spent this morning clearing the debris off all the fencing. From cupboard doors, tries and all sorts of trash, mostly plastic all mixed in with the copious amounts of weeds and grass. We also managed to untangle our log swing seat and cart it back to our section in bits using the ride-on lawn mower and trailer. It ended up about 100 meters away from its original location in the neighbours oppoiste boundry fence. How the hell it went over the fence inbetween our sections without destroying the fence I have no idea. The power of mother nature is truly amazing... if not a little scary. 

My hand on the tree below indicates the water level , and where I'm standing at ground level is about two meters above the normal level of the river. So its came up about 4 meters ... 150mm of rain in less than 12 hours is a hell of alot of rain. So glad the house is higher.


Onto more fun topics (The Good), my order of water washable resin turned up and I'm currnetly trying that out. Already the smell from the raw resin is way less moxious. So hopfully with some tips I've picked up online I'll get past the problem of the printes sticking to the FEP... or leaving small layers on the FEP in the vat. Even when I'm getting good prints.


Currently printing some Uraki  Orc's for Lord of the Rings, 
Uraki Orcs


The local liquor store is still doing lockdown contactless deliveries, which is keep me in good spirts with a couple of very drinkable drops. One of my favourites of recent times, being the Suntory Whisky makes for very easy drinking and goes with choclate very very well.


Fabic printing

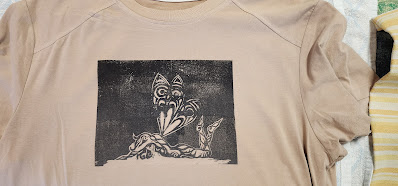
  After some hit and missing printing onto the t-shirts I did some more research and ended up getting myself some Essdee fabric inks along w...